13. Drawing a digital Altimeter

Now that we wired our Teensy to a TFT LCD ILI9341 display, lets go ahead and revisit our previous sketch that received data from Microsoft Flight Simulator 2020 via our C# app. We'll add the SPI.h and ILI9341_t3.h libraries and #defines for the TFT and create an ILI9341_t3 instance tft to draw. We also added variables to store the current and previous values for both the altitude and barometer for refresh purposes.
The Code
#include "SPI.h"
#include "ILI9341_t3.h"

#define TFT_DC 9
#define TFT_CS 10
#define CHAR_WIDTH 6

ILI9341_t3 tft = ILI9341_t3(TFT_CS, TFT_DC);

float currentAltitude = 0;
float previousAltitude = -1;

float currentBarometer = 0;
float previousBarometer = -1;

void setup() {
  // initialize the port and set the baud rate to 115200, change to 9600 if you are having communication issues, but make sure it's the same rate as in the C# code
  Serial.begin(115200);

  tft.begin();
  tft.setRotation(1);
  tft.fillScreen(ILI9341_BLACK);

  // labels
  drawTextCentered("Altitude (feet)", 0, 2, ILI9341_WHITE);
  drawTextCentered("Barometer (inHg)", 120, 2, ILI9341_WHITE);

  // refresh values
  update();

  // wait for a serial connection before beginning
  while(!Serial);
}

void loop() {
  // check if we have at least 8 bytes. our full message should be 9 bytes,
  if (Serial.available() > 8) {
    currentAltitude = readFloat();
    currentBarometer = readFloat();

    Serial.readStringUntil('\n');

    update();
  }
}

// util method to read 4 bytes from the serial port and return them as a float
float readFloat() {
  char buffer[4];
  Serial.readBytes(buffer, 4);

  float value;
  memcpy(&value, buffer, sizeof(float));

  return value;
}

// util method to redraw the values
void update() {
  if (previousAltitude != currentAltitude) {
    tft.fillRoundRect(30, 40, 260, 50, 10, ILI9341_GREEN);
    tft.drawRoundRect(30, 40, 260, 50, 10, ILI9341_WHITE);
    drawTextCentered(String(currentAltitude), 50, 4, ILI9341_BLACK);

    previousAltitude = currentAltitude;
  }

  if (previousBarometer != currentBarometer) {
    tft.fillRoundRect(30, 160, 260, 50, 10, ILI9341_GREEN);
    tft.drawRoundRect(30, 160, 260, 50, 10, ILI9341_WHITE);
    drawTextCentered(String(currentBarometer), 170, 4, ILI9341_BLACK);

    previousBarometer = currentBarometer;
  }
}

// util method to draw centered
void drawTextCentered(String text, int y, int size, uint16_t color) {
  int offset = 160 - (text.length() * CHAR_WIDTH * size / 2);

  tft.setTextSize(size);
  tft.setCursor(offset, y);
  tft.setTextColor(color);
  tft.print(text);
}
Initialization
We initialize our tft in the setup() method like before and add some labels for the "Altitude (feet)" and "Barometer (inHg)". Since these we will only update a portion of the screen to draw the actual values, we only need to draw these labels once during setup(). Finally, we call the update() function to draw the values on the screen and wait for the Serial port to be opened, so that we wait until our C# app connects and starts sending data.
Loop
In our loop() function, we replaced the the code that sent the altitude and barometer values back to the C# app, in favor of the update() function. If we look at the update() function's body, we have two similar sections, for altitude and barometer. Let's examine the altitude section.
To reduce updates, we only redraw when the new currentAltitude value is different from previousAltitude, We draw 2 rectangles, a solid GREEN one for the background, and a WHITE one for the border. We call the same drawTextCentered() function we used to draw the labels and we finally store the new currentAltitude value as previousAltitude for the next loop() pass.
Centering Text
The void drawTextCentered(String text, int y, int size, uint16_t color) function is a handy utility function I use on a lot of my projects. Since displaying text is based on the top-left corner of the first letter in the String, based on the String's length() we can calculate how much we need to offset the x coordinate so that the entire text is centered.
Since I called tft.rotate(1) in the setup() function, the resolution is 320 x 240. If we want to make the text centered, we start from x=160. We calculate half of the String's length(), times the text size, times the character's width. We then subtract that from 160 and we have a rough position to make it centered.
Let's say we have "Hello World!". String length is 12. Font size is set to 4. Default font width is 6.
offset_x = 160 - (12 * 4 * 6 / 2) = 160 - (144) = 16
Build and Run
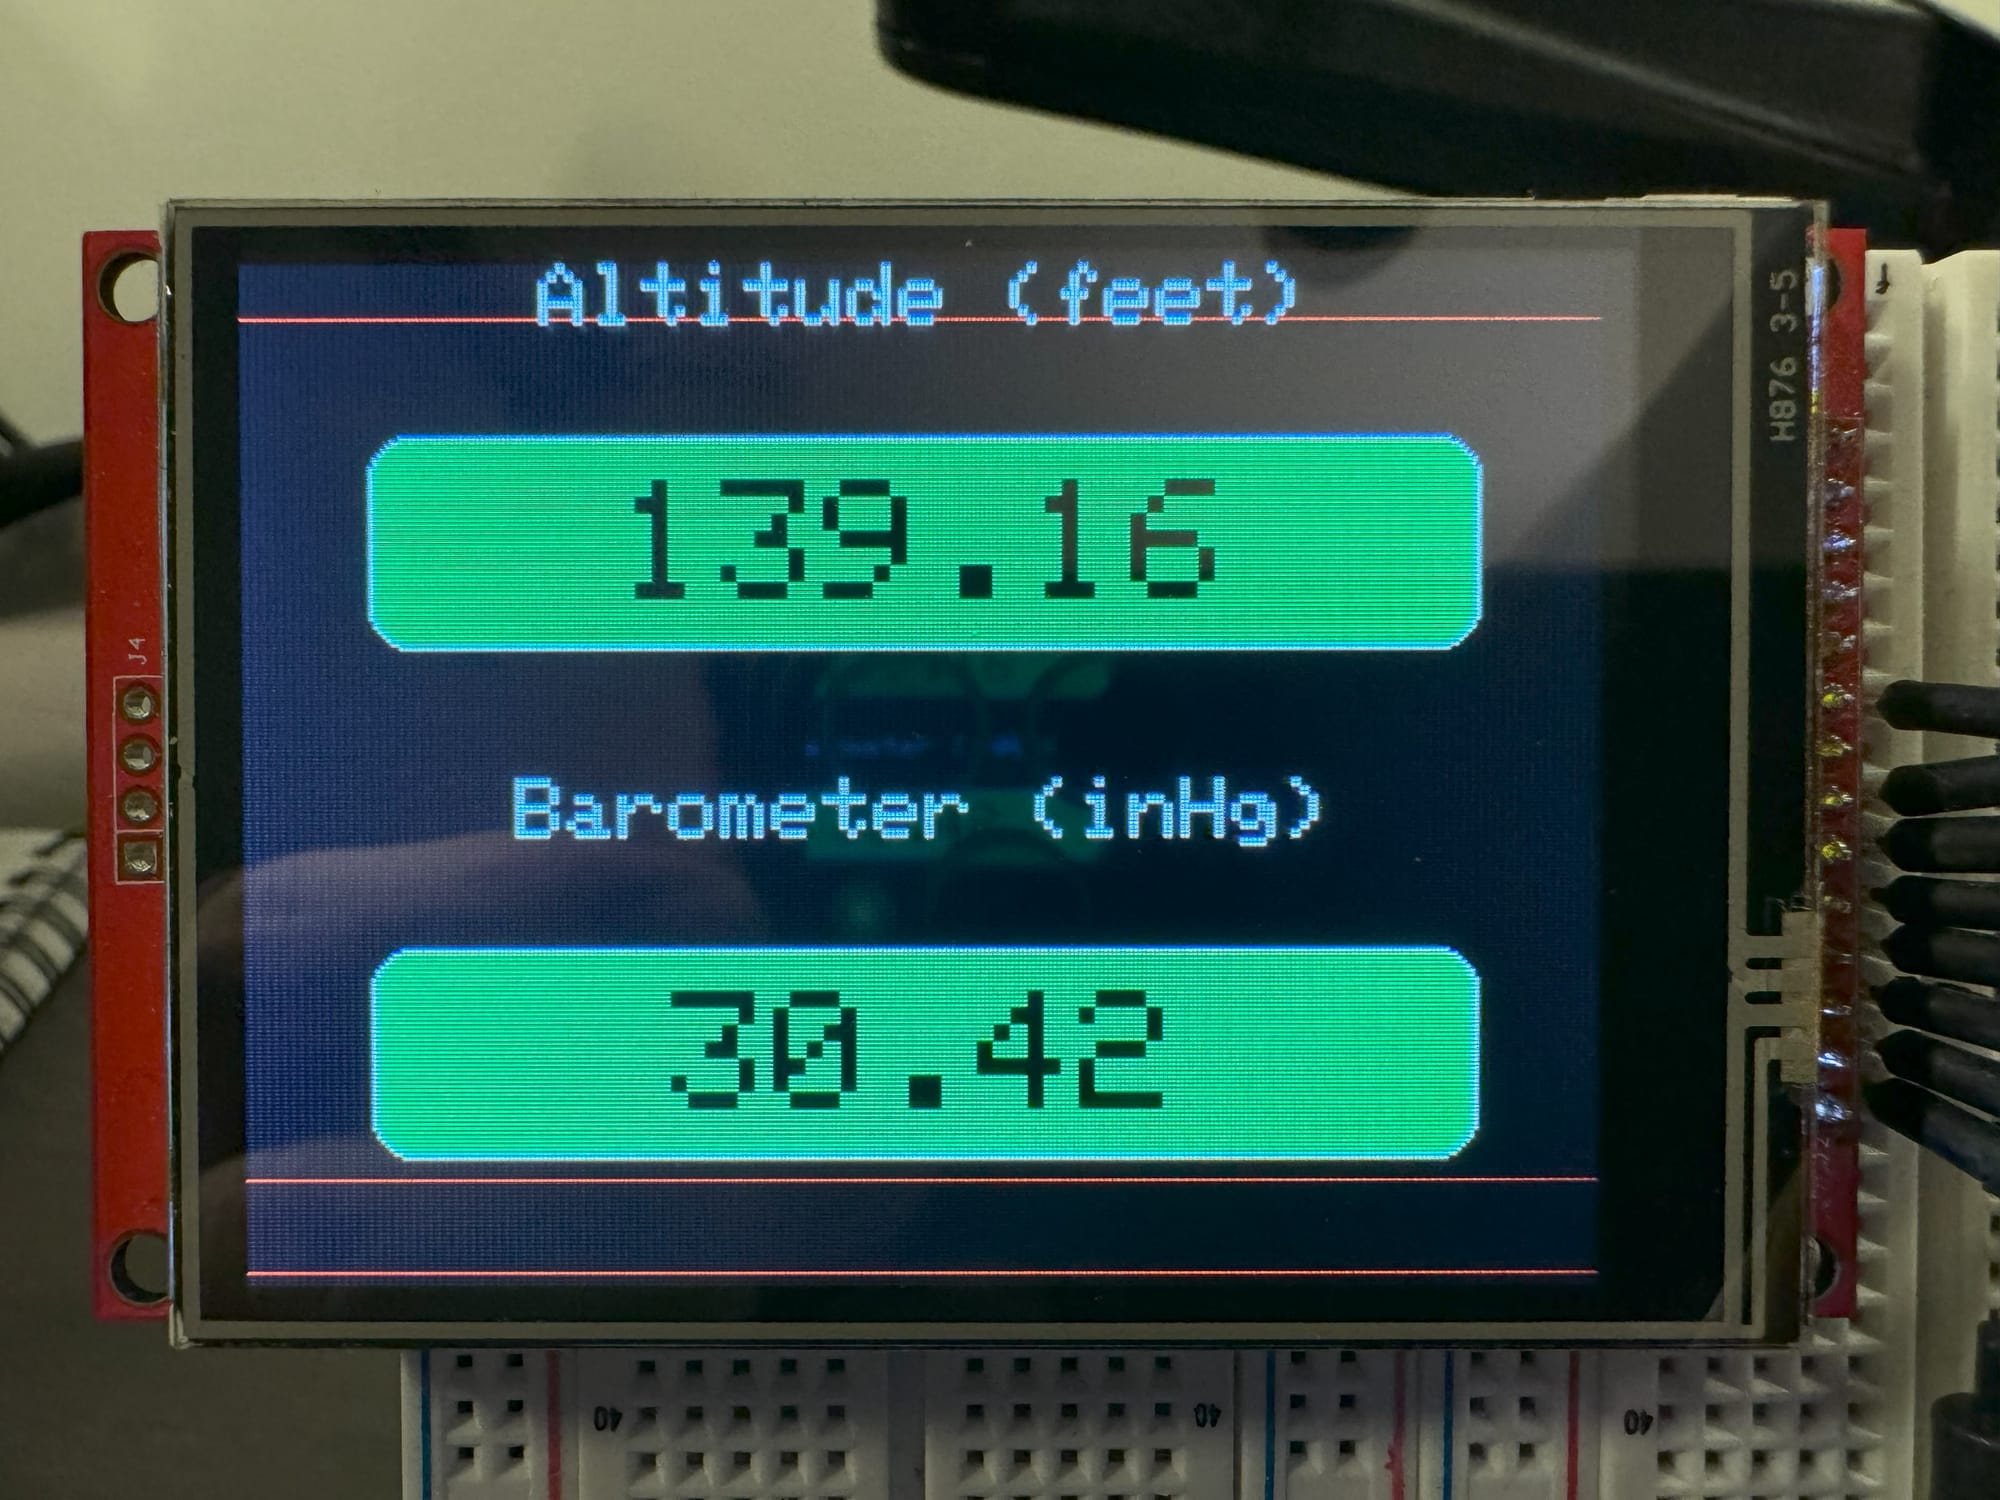
If we build and upload the Sketch into our Teensy, run Microsoft Flight Simulator 20202 and load a flight, run the Hello MSFS app and click on Connect, we should see something like this:

Please ignore the red lines, this screen is damaged and it has those 3 rows of pixels permanently red, so it is the one I use for development ;-)
Now fly around or change the barometer setting in your plane's Altimeter and see how these change. Immediately you will notice that the altitude value flickers a lot compared to the barometer value. This is because it is constantly changing and it needs to redraw this section a lot.
Wrapping up
At this point I have provided all the building blocks needed to pull data from Microsoft Flight Simulator 2020 using the SimConnect SDK, sending the data down to a device via a USB Serial connection, and draw an instrument based on the data on a TFT LCD display. Now you can start designing your own instruments that mimic the typical steam gauge instruments or even digital ones like the Aspens or Garmin digital display instruments.
The only thing we are missing that I'll be covering in the next post is how to send events from the device back to the sim. Later on, we'll talk about how we can use the GFXCanvas16 to minimize the flickering by drawing to a in-memory canvas and updating only the necessary areas of the screen.
